3 Easy Methods for Fixing Squeaky Stairs
How to Fix Squeaky Stairs from Underneath the Staircase
A squeaky staircase is an unpleasant nuisance in a home but thankfully it is easily addressed. Squeaking stairs are caused by joints that either lack the appropriate wedge, do not have sufficient support, or have worn down over time. The best methods for addressing a squeaky staircase require access to the underside of the stairs. From there, the best options for fixing the creek are to; attach glue blocks, replace worn/missing wedges, or insert small slip wedges into the joints. These 3 methods for fixing a squeaky staircase are detailed below.
Method 1: Attach Glue Blocks
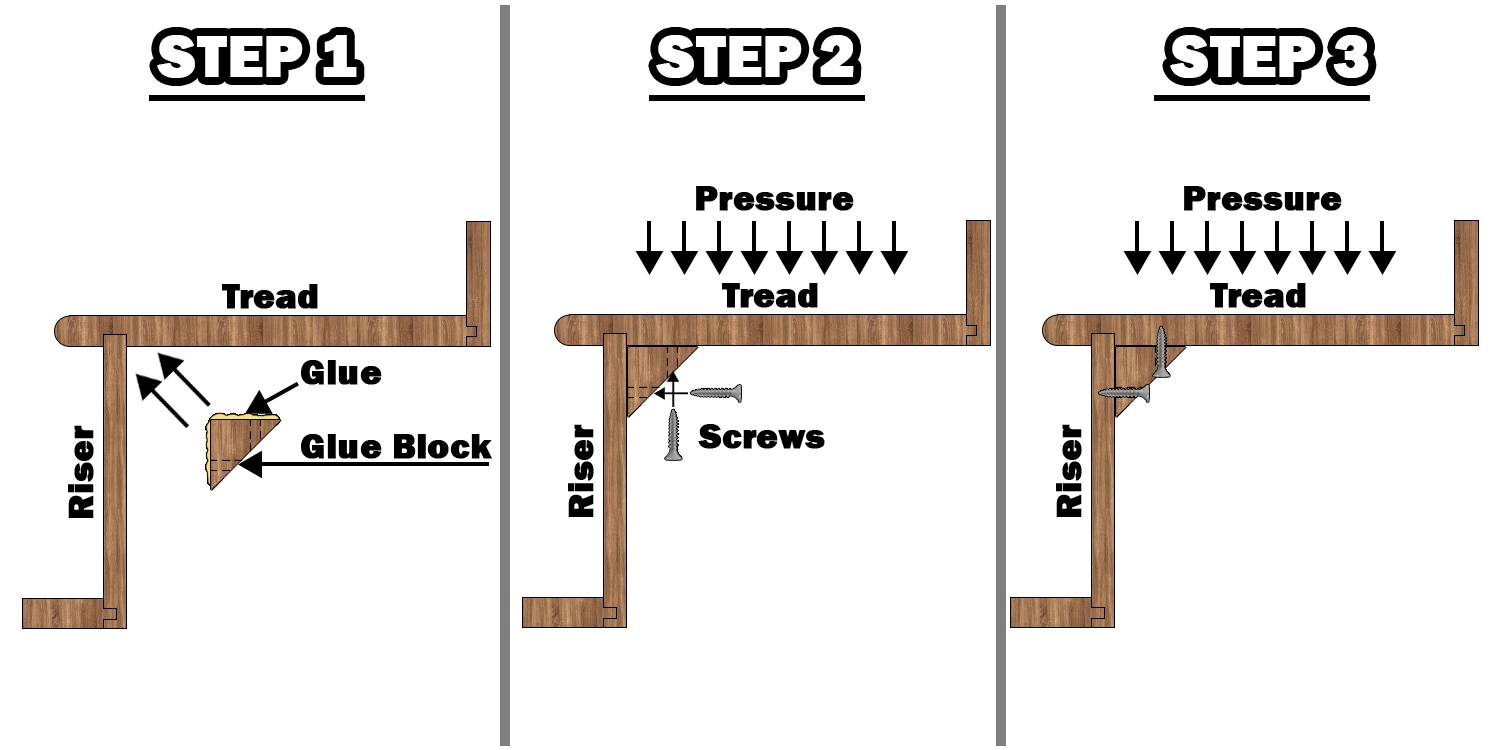
Generally, the easiest and most effective way the strengthen the joints between risers and treads is to use "glue blocks". These are triangular shaped small wooden blocks which can easily be made by sawing a square block diagonally in half. Four small pilot holes are drilled into the block at right angles to each other. The glue blocks need to be placed near each corner (and one in the middle on wider staircases) where the tread meets the top of the riser.
Install the glue blocks with the help of these three simple steps:

Step 1:
Clean the surfaces where the glue blocks will be attached, this makes the gluing easier. Apply adhesive to the glue blocks, wood glue should do the trick. It is important to move the glued block back and forth to work out any air pockets within the glue.
Step 2:
Place the glue block into position as shown and line up the securing screws ready. It is important to use screws of the appropriate length. You do not want the screws to go all the way through but you will want them to have good purchase. Remember to use MDF screws if you have MDF treads and risers.
Step 3:
Taking care not to push the screw through the tread or riser, carefully drive in the screws. If you have someone to help, get them to stand on the tread while you drive the screws home. The extra pressure will help keep the tread nice and tight against the glue block.
As an alternative to glue blocks, or in addition if there is enough room, you could add small rectangular blocks to the corners of the stairs to secure the treads to the strings. The blocks would be secured by screws at right angles to each other, one boring into the bottom of the tread and the other into the string. Again, it is recommended that the blocks be coated in glue and moved around back and forth on the surface of the wood to eliminate any air pockets.
Method 2: Replace Worn or Missing Wedges
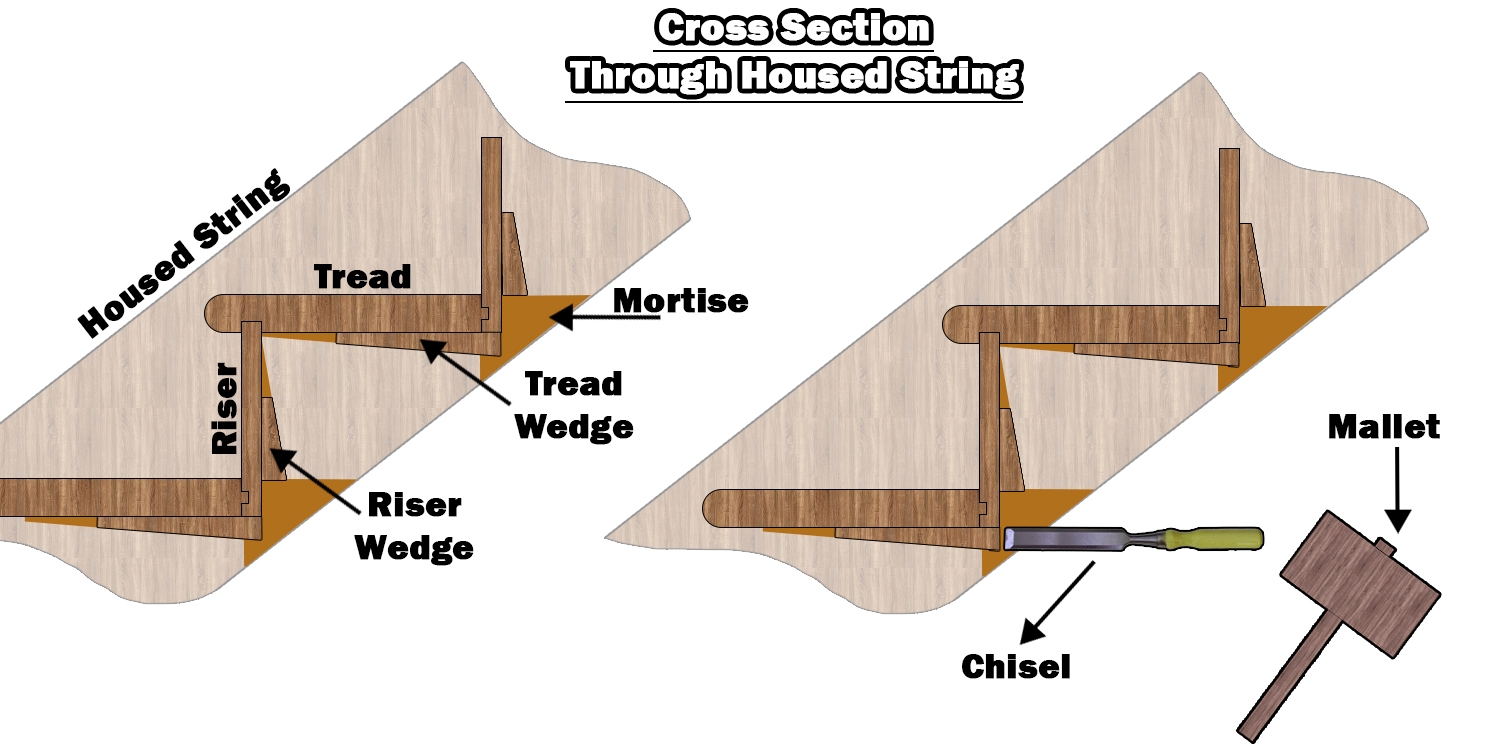
If the staircase is built into a housed string system, it most likely contains securing wedges for the risers and treads. These wedges would have been placed in the staircase when it was originally constructed. They are used to butt the risers and treads up against the mortises of the housed string so that no gaps are visible between the strings, treads, and risers.
Over time and extensive use of the staircase, the wedges can slip or become damaged. This can also lead to the dreaded creaking or squeaking. A slipped or damaged wedge can normally be spotted if there is a gap showing on the staircase between the tread and/or riser and the string mortise.

Inspect the rear of the staircase. If you find any loose or worn wedges, gently chip out the old wedge with a chisel. Should the wedge be too damaged to refit into the mortise, new wedges can be purchased from our online shop.
Coat the new replacement wedges with glue and use a mallet to gently drive the new wedges into place. In addition, before fitting the new wedges, inject some adhesive into the mortise - that way, when the wedge is inserted again, the tread or riser will bond with the glue in the mortise and provide extra grip.
Method 3: Insert Small 'Slip' Wedges
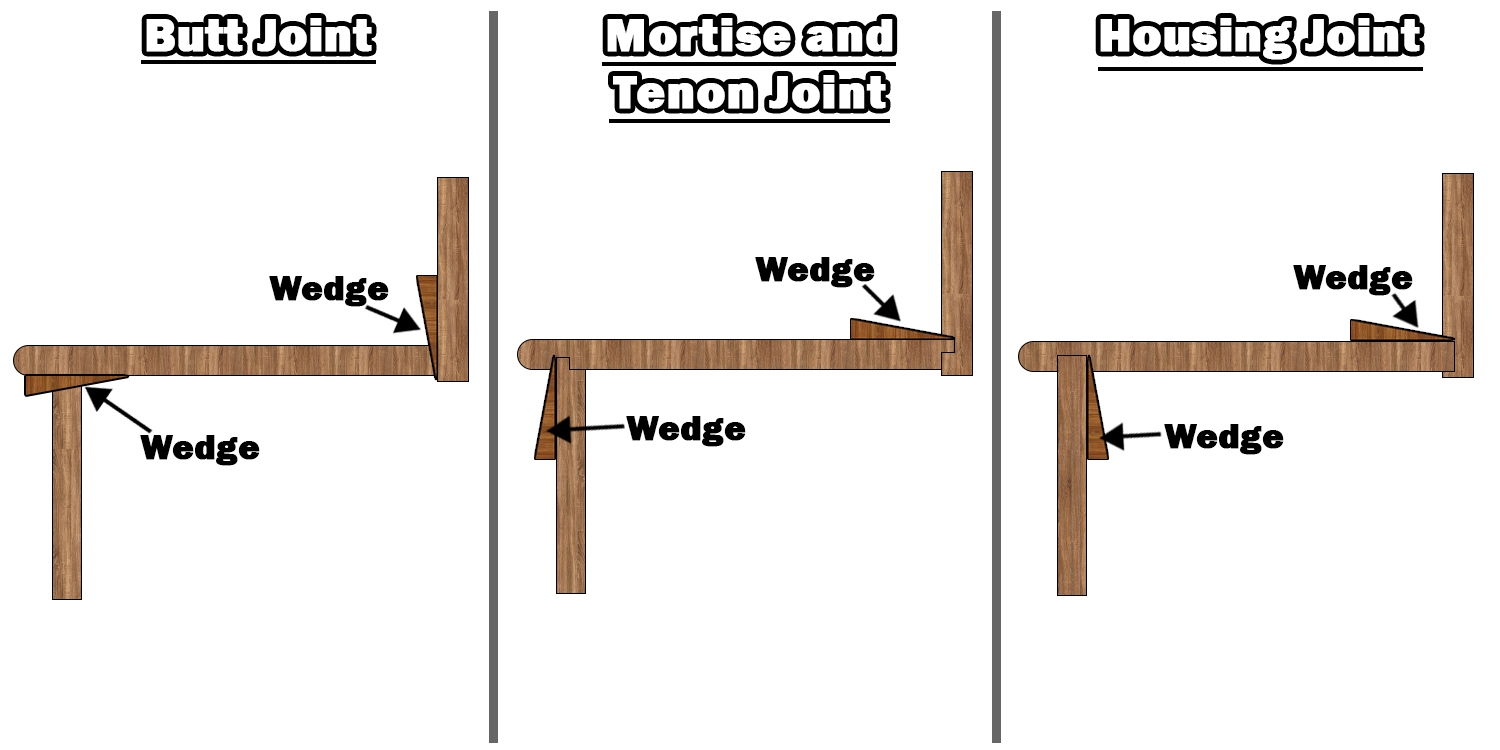
Another method of effectively tightening the joints is to insert small 'slip' wedges into the joints. The procedure of inserting these wedges varies, based upon what types of joints have been used. Each wedge should be about 30mm long and tapered down from 3mm to a point. Apply some glue to the wedges and insert them as follows according to your stair joints:

Once the glue has dried, use a sharp chisel to trim off the ends of the protruding wedges.
At Pear Stairs we sell a variety of products to finish your staircase. If you have any questions don't hesitate to phone our friendly team on 01938 553311 for expert advice, or click on the Contact Us button to get in touch by email.


